How FixVare Software Works?
Complete step-by-step guide to convert, migrate, and manage your email files
Email File Conversion
Step-by-step procedure to convert email files between different formats
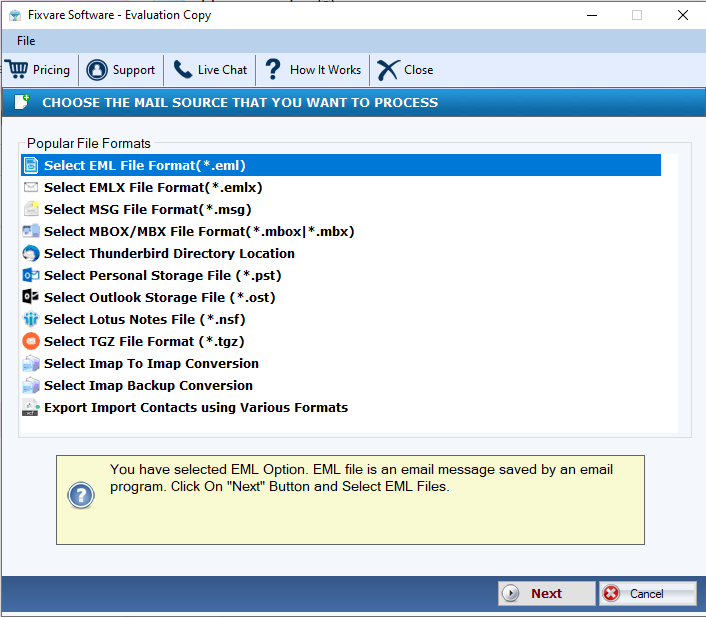
Launch Software and Select Source File Format
First, open the FixVare software and choose your source file format which you want to convert, import, or migrate into another file format.
- There are multiple options available - kindly choose any required option (EML, PST, OST, MSG, NSF, etc.)
- Click on the Next button to proceed
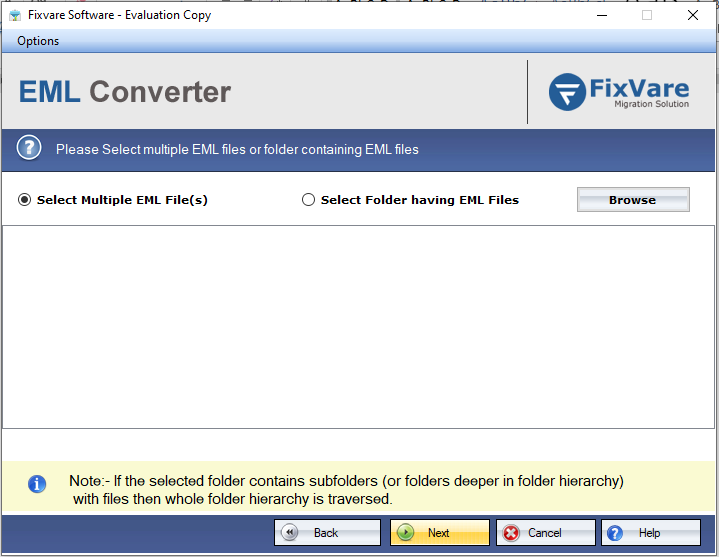
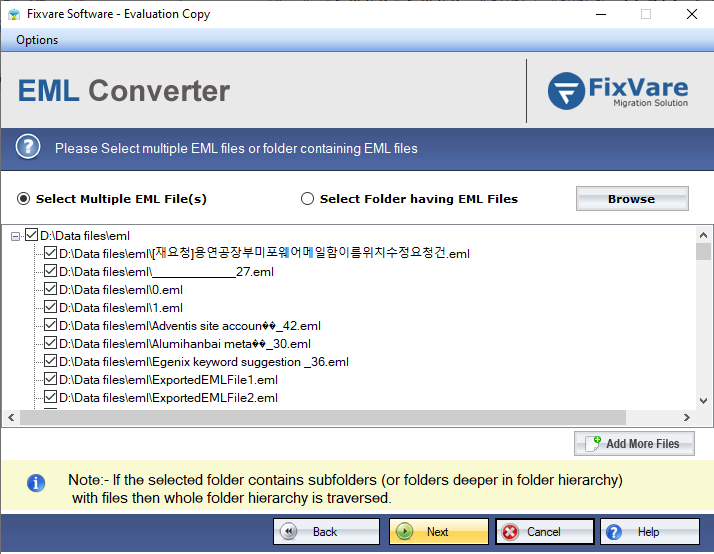
Select Source Files or Folders
For example, if you choose Select EML File Format (*.eml) option, a browse window will open as shown below.
- In the browse window, you can select your Source File or folder
- The software will show you a preview of selected files or folders
- Check your files and folders, then click the Next button to proceed
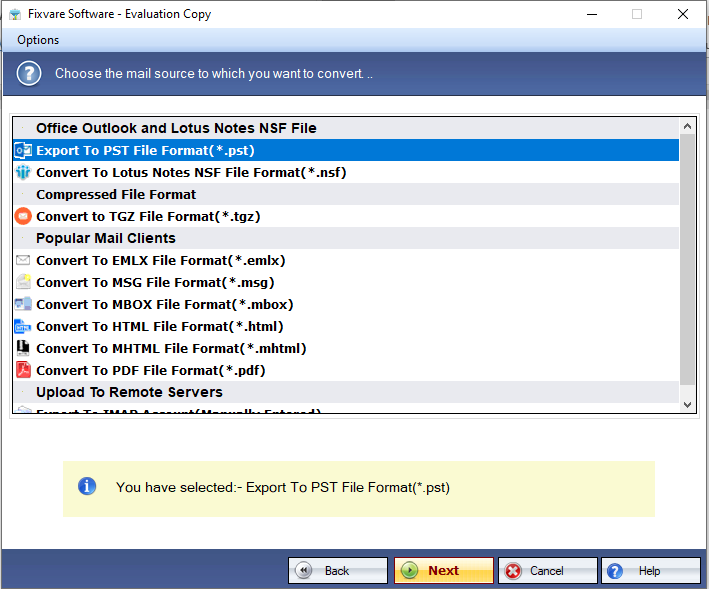
Choose Destination File Format
In the next option, you need to choose the desired output format in which you want to convert, move, or transfer your source file.
- Select from available formats: PST, EML, EMLX, MSG, PDF, HTML, MHTML, etc.
- Click the Next button to continue
Configure Settings and Start Conversion
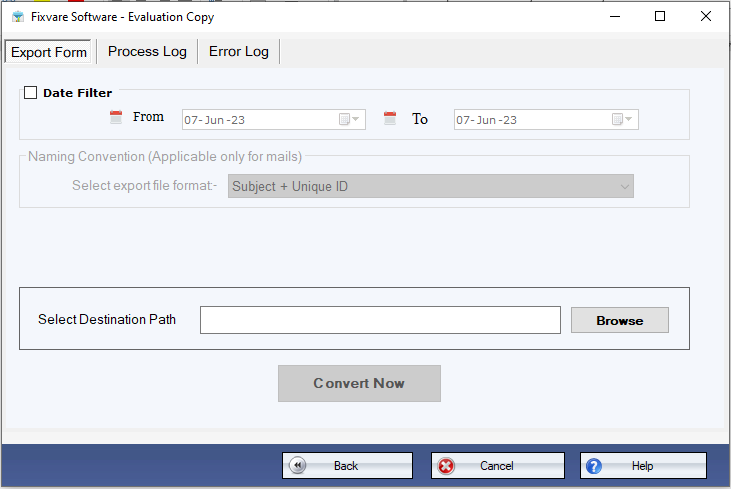
For PST Format: If you choose PST, then few filters and output location options will be provided as shown below.
For Other Formats: If you choose EML, EMLX, MSG, PDF, HTML, or MHTML, then naming convention options will be visible to format file naming.
- Choose date filter if required
- Select destination path where you want to save your converted file
- Click on the Convert Now button to start conversion
Local to IMAP Importing
Step-by-step procedure to import local emails to cloud email accounts
Select IMAP Import Option
If you want to upload your files to a server, you can choose the IMAP option and connect your server with the software to upload your local files into server emails like Gmail or webmail.
Address Book Management
Step-by-step procedure to migrate and manage contacts
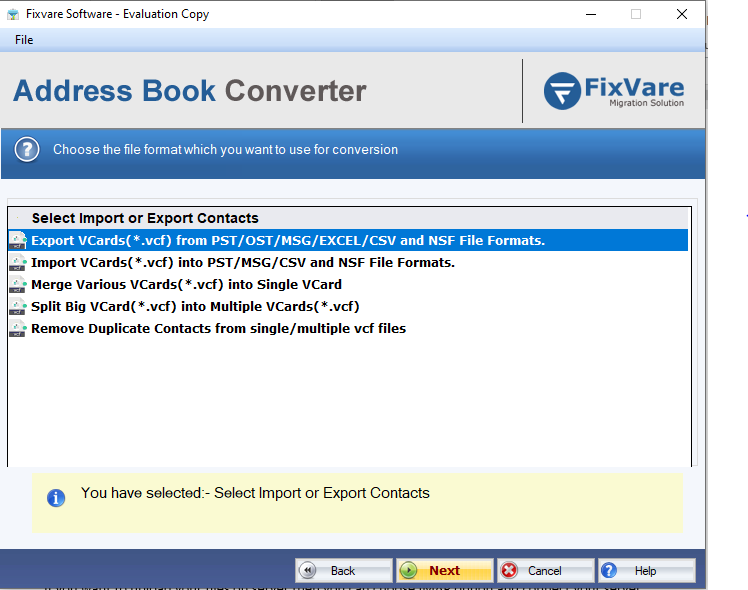
Select Contact Conversion Option
There are multiple options available for contact conversion. You can choose accordingly based on your source and destination formats (VCF, CSV, PST, MSG, etc.).
Backup Emails to Local
Step-by-step procedure to backup email files from online accounts
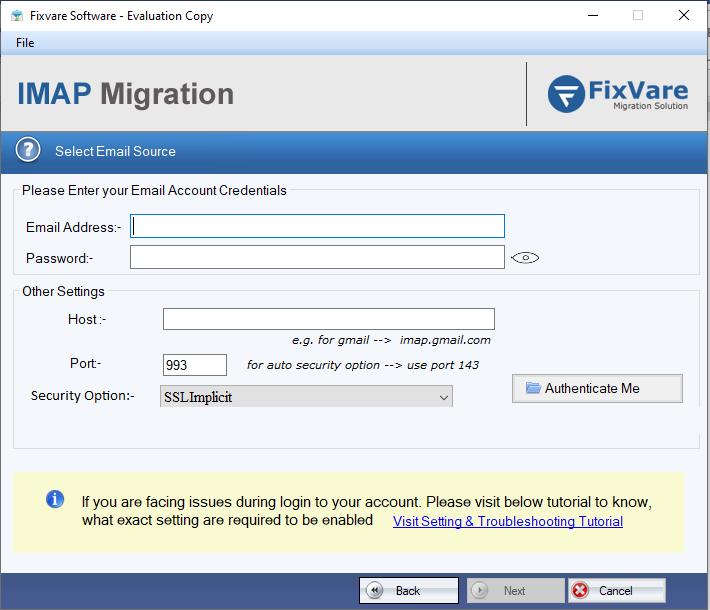
Connect to Email Account
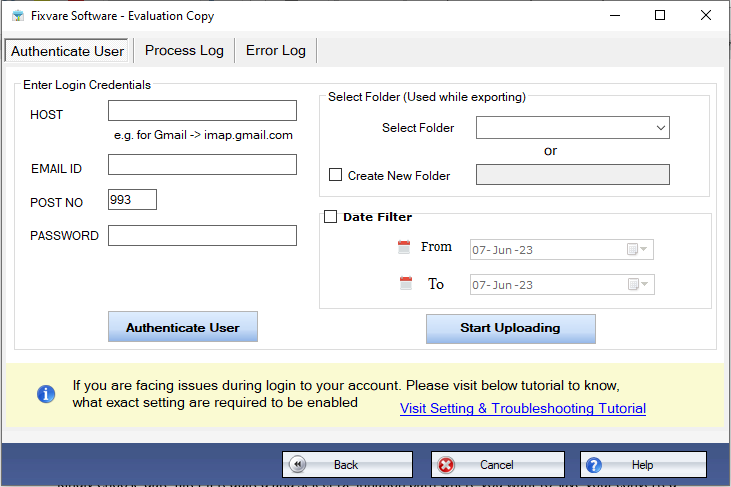
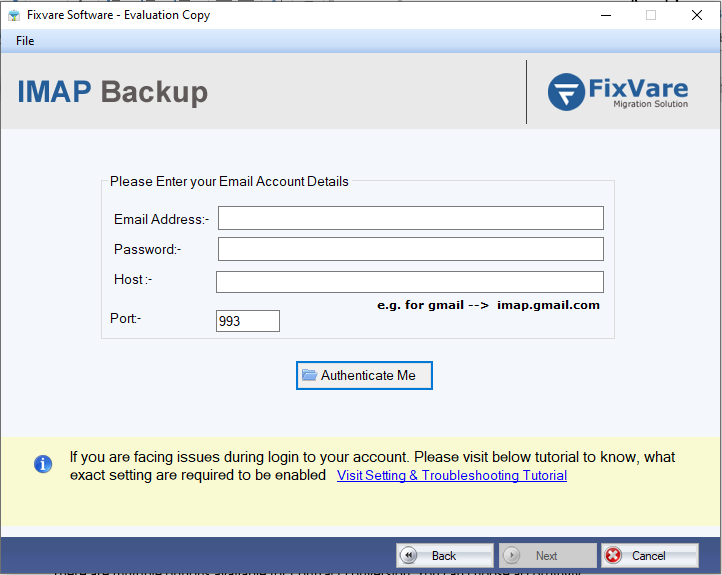
If you want to take online email backup, you can use this tool to backup emails. Click on the IMAP backup option and connect the software with your email ID.
- Simply enter your Email Address, Password, Host, and Port Number and click on the Authenticate Me button
- If you need any help, click on Visit Setting & Troubleshooting Tutorial button
Choose Backup Format and Location
The software will provide you with multiple options to save your online emails to your local machine.
- Choose your desired option (PST, EML, MSG, PDF, etc.)
- Select the destination folder where you want to save the backup
- Save your emails locally in the desired file format

IMAP to IMAP Migration
Step-by-step procedure to migrate emails between IMAP accounts
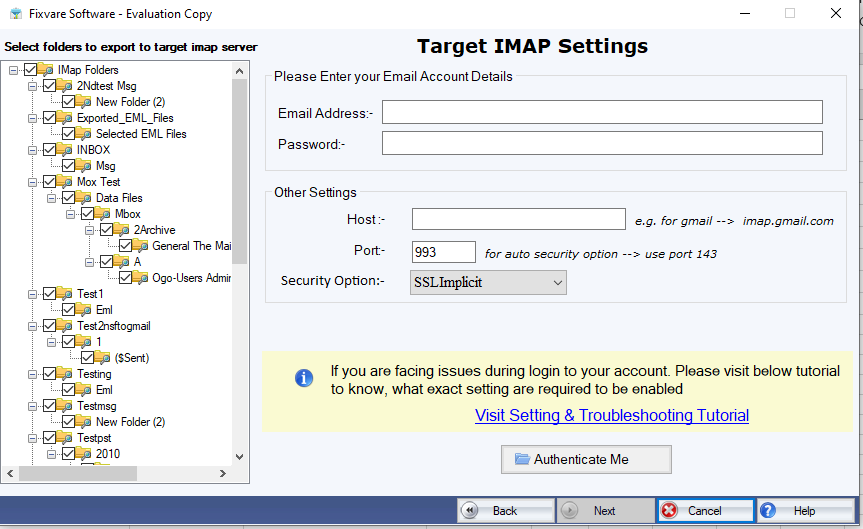
Enter Source and Destination Account Credentials
You can migrate one email address to another email address using this IMAP migration option. Click on the IMAP to IMAP migration option and enter your credentials for both source and destination accounts.
Select Folders and Start Migration
You can choose selected folders and move them to the new server smoothly via this option.
- Select the folders you want to migrate
- Configure migration settings if needed
- Start the migration process
Need Help? If you need any assistance, kindly contact our support team via live chat or email. We will be happy to assist you!