Step 1: Download, Install, and Run FixVare MBOX to IMAP Migrator.
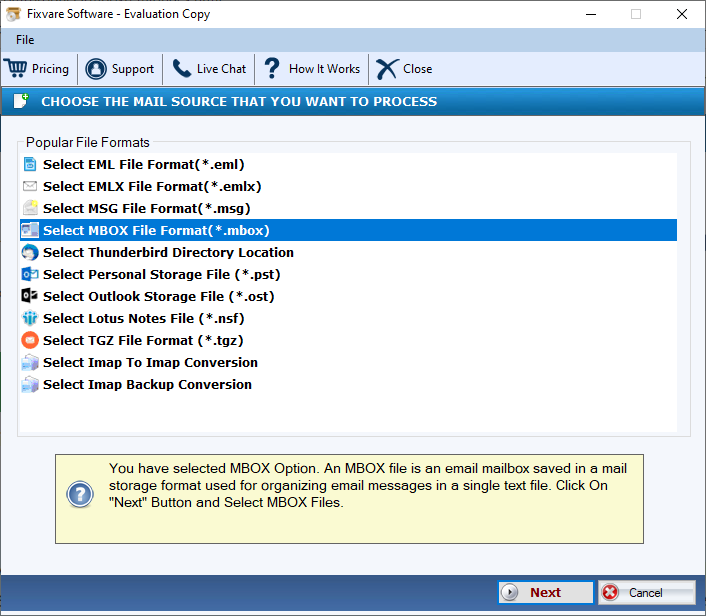
- Choose the Mail Source: Select MBOX File Format (*.mbox) and click on the "Next" button.
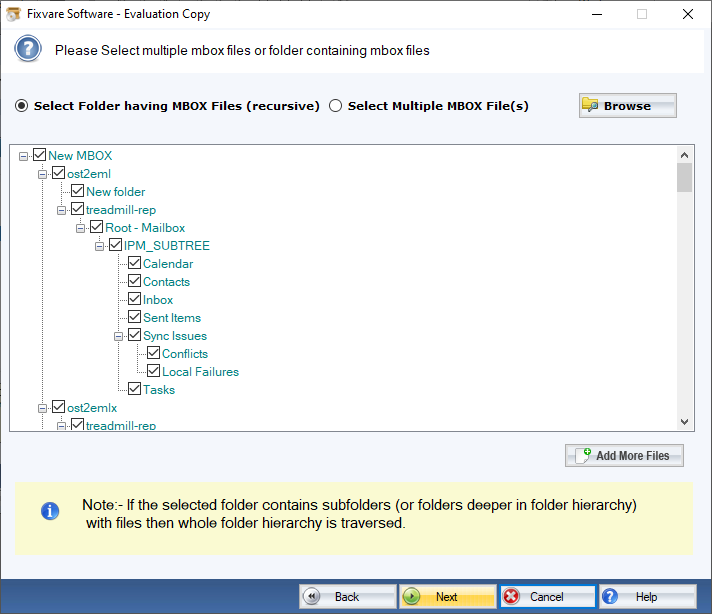
Step 2: Select single or multiple MBOX file(s) one by one or folder having MBOX files.
- There are two options to select MBOX files.
- Select Folder having MBOX files (recursive): Choose this option to select complete folder containing MBOX files.
- Select Multiple MBOX File(s): Choose this option to select single or multiple MBOX files.
- Click on the "Next" button.
Step 3: Select export option for IMAP
- Select "Export to IMAP Account (Manually Entered)" option and click on the "Next" button.

Step 4: Connect software to IMAP account.
- Host: Enter host account like for Gmail enter imap.gmail.com
- User Name: Enter IMAP account address.
- Password: Enter IMAP account password.
Click on the "Authenticate User" button to connect software to IMAP account.
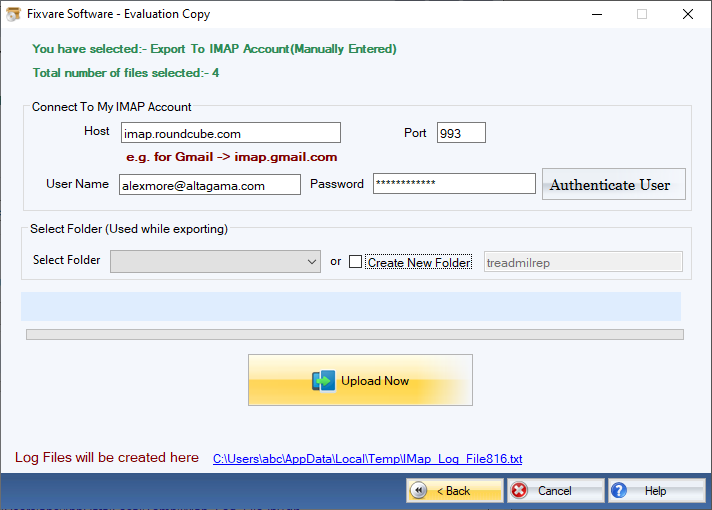
Step 5: Import MBOX to IMAP account.
- Select Folder: This option allows you to import MBOX file in existing folder.
- Create New Folder: This option allows you to import MBOX by creating new folder.
Click on the "Upload Now" button to upload MBOX to IMAP account.